Joining a Server to a Domain

This post is basically for my own reference but if it helps someone else that’s great.

On the server open up a command prompt and type ipconfig /all this will display a list of settings. You need to check to see which is the Default Gateway. In this case I needed my Default Gateway to be the Domain controller for my Domain, and I needed to change it. To do this you need to go to the Network and Sharing Centre. This can be reached by going to the Control Panel (my server was Windows 2008 R2) then Network and Internet, then Network and Sharing Center.

NetworkAndSharingCentre

On this panel you will should see a Local Are Connection. Click on this and then go to Properties. On this screen look for Internet Protocol Version 4 (TCP/IPv4) and then click on Properties. This shows a screen where you can change the Default Gateway and Preferred DNS server. I altered both to point to my desired Domain Controller. I then saved the changes.

InternetProtocolVersion4Properties

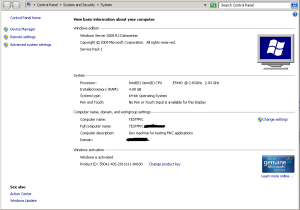
I was then able to go to the System window for my server, this can be reached either through Control Panel -> System and Security -> System or in Windows Explorer right-click on Computer and go to Properties. On this screen you will be able to ‘Change Settings’ to specify the Domain you want your server to join.
SystemChangeSettingsPanel

TeamCity cannot start

We use TeamCity at work as our Continuous Integration server. It’s a very useful tool. This morning it wasn’t running because of a sys admin change. Most of our servers are virtual machines and the change was to do with configuring the SCSI. I’m not quite certain why the change was made but it involved a re-start to the servers.

Now, as far as I’m concerned a re-start to the server shouldn’t have caused problems but of course sometimes it does. One of the reasons why is that settings are altered every so often and re-starting a server causes some of these changes to be re-set or for default settings to start.

I access TeamCity via a URL and when I found I couldn’t my first thoughts were that the service wasn’t running on the server. I logged onto the server but the services were running. Checking the log files for TeamCity told me that ‘something’ was using port 80, which TeamCity needed to use. I also checked the firewalls just in case any of the them had reset and were now blocking access. TeamCity accesses a remote database.

The steps we took at work to solve this were as follows.

  1. We read the logs this told us that it TeamCity could not use port 80.
  2. We looked at Task Manager, then Resource Monitor (the server is Windows 2008 R2) where we could see that ‘something’ with process ID 4 was using port 80.
  3. We downloaded ProcessExplorer to find that it was the ‘NT Kernel & System’ that was using port 80, although we could have used Task Manager to tell us this, we just needed to altered the view to show process ids.
  4. We then read this really good article about “NT Kernel & System using Port 80” this told us that we needed to disable the Web Deployment Agent Service. This was the culprit using port 80.

Note, I say we since Richard at work helped me a lot to solve this. I’m a touch disappointed with myself since I guessed what had happened, the server restart had caused something to reset but I hadn’t found what had done it. I sometimes have a blinked approach where I stare at one thing wondering why I can’t find what is wrong. What is often needed is to step back and look again with fresh eyes.

All this is experience though and I’m writing it down so I’ve got something to refer back to. Hope this helps someone else too.

This is the article that Luke Browning wrote that helped me.

NT Kernel & System using Port 80
I had been trying to set up Internet Information Services (IIS) under Windows 7 to use PHP and MySQL to save myself the trouble of having both IIS and XAMPP installed. After a short time I managed to get it running rather easily using the Web Platform Installer. This was great apart from a couple of small annoyances when developing PHP applications. After a few weeks of use, I decided it was about time to switch back to XAMPP as it removed all of the annoyances I had encountered – here, I ran into a couple of problems!

IIS Removal
I began by uninstalling IIS from the “Turn Windows features on or off” dialog in “Programs and Features”. This seemed to go fine and about a minute later I was rebooting my system.

Once my system had rebooted, I began the installation of XAMPP and got right to the end where it mentioned apache could not start. I thought this must be due to having some other peice of software bound to port 80, e.g. IIS didn’t uninstall correctly or Skype was running – neither of which were the case. I downloaded a tool called TCPView which allows me to see all of the connections from my machine and which application they originate from. I found the http protocal that was listening on the local port (being port 80) belonged to System (PID 4).

Upon looking up this process in Task Manager, I found it to be the “NT Kernel & System” which immedietly made me assume it was an incomplete removal of IIS. I tried reinstalling and removing IIS, uninstalling all of the related web tools such as the Web Platform Installer, IIS Redirects and finally rebooting the system a couple of times. None of these methods fixed the problem and Google searches were not finding any useful information.

The Solution
It appears there are a couple of different applications that can cause this same problem;

1.IIS is still running.
2.SQL Server Reporting Services is running.
3.Web Deployment Agent Service is running (this was my problem).
To fix my issue (number 3), I followed the following procedure:

1.Open up the services screen (Right click “Computer” from either your desktop or start menu, then “Manage”. Once the window has opened, expand “Services and Applications” and select “Services”).
2.On the services screen there should be one called “Web Deployment Agent Service”, if this is running, double click it and stop the service.
3.Finally, change the startup type to “Disabled”.
Now if you try to run apache on port 80, it should start fine!
Publishing an MVC site to load balanced servers

The purpose of this post is just a few notes to remind me of the steps I followed yesterday when publishing an MVC site to our load balanced servers.

We have three web servers and our hosting company controls the load balancing for us. So, it’s possible that some of the solutions that worked for me might not work for you.

When I first created the website I simply had one simple html page. Checking this page in a browser at first worked but after a refresh showed a 500 error, which took me by surprise. I refreshed the page several times, sometimes it would display, other times the 500 error was shown. The problem here was permissions. Using IIS on one of the servers I went to the site, clicked on Advanced Settings and added the correct account in the Physical Path Credentials. Now, anonymous users coming to this site use this account’s permissions as a proxy. That last sentence sounds complicated but it explains (at least to me) why this step needed to be taken.

I was then ready to publish the actual site, which I did using the Publish facility in Visual Studio. All the files went across but when I tried the site I saw an error saying that it couldn’t find the System.Web.Helpers DLL. My first thought was I just put this in the GAC but then I thought this could be due to MVC not being installed on the server. I found this post by Josh Gallagher, which details quite nicely how to ‘Add Deployable Dependencies’. Doing this meant my site was up and running and I didn’t need to re-start live servers (which simply was not an option!). I also added the <identity> key to my web.config so as my site can access the data stores to get the necessary information.

However, all was not over. My MVC site uses Forms Authentication and I found that whilst I could log in, every so often when I clicked on a link I was being prompted to log in again. This made me think that I was being authenticated on one server but when the load balancer switched me to a new server I needed to go through the process again. The way to solve this problem was to add a <machine key> setting to the web.config file. This has various attributes: the validationKey decryptionKey, validation and decryption. Setting these values and adding this key to the config file solved the problem. So, I could now log in and move around the site regardless of which server was serving the content.

The next problem was more specific to my application. I am using an ASPX page, which has a Microsoft ReportViewer control. During development I did try and see if I could host this within MVC but that didn’t seem possible. Steps that needed to be taken here was making sure the identity my site uses has permissions to see the reports on the report server and adding another setting to the web.config. This time the <sessionState> key. Again this was needed because of the site being on load-balanced servers and getting the message ‘ASP.NET session has expired or could not be found’. After all that I put my feet up and had a cup of tea!

Migrating TeamCity from its internal database

When I first installed TeamCity, a continuous integration tool from JetBrains, I went with its default setup, which uses its internal database to keep track of builds and so on. TeamCity displays a warning that the internal database should only be used for evaluation and that if using TeamCity for production purposes it highly recommends using an external database.

This is a task that’s needed doing for a while but I’ve not really been looking forward to it. Finally, today I bit the bullet, grasped the nettle, and every other cliche (and like the readers of this sentence are wishing) got on with it!

As we’ve been using TeamCity now for five months there is quite a bit of data that I didn’t want to lose so I wanted to migrate the data. The instructions are quite detailed and I feel can cause a bit of confusion but basically there are three steps to follow.

  1. Create an external database. For me this was Microsoft SQL server, version 2008 R2. In Management Studio I created a new database called TeamCity and a new login. I right-clicked on the new login, selected properties and mapped the user to this new database.
  2. I then downloaded the native driver for SQL Server for TeamCity to use. I got the MS sqljdbc package from Microsoft. The extension said it was an exe but it is a zip file. Un-packing it I put the sqljdbc.jar into the correct folder following the TeamCity instructions
  3. Then again following the instructions I created a database.properties file putting in the appropriate values. Make sure you look closely at the typing since I had some problems running the maintainDB tool when it couldn’t find the correct driver.
  4. Shut the teamcity service down.
  5. I then needed to run the maintainDB tool to move data into the new database. I had some problems here. The instructions explicitly state that you only need to specify two arguments: -A and -T. However, you also need to specify the source. Thankfully I found this post and the excellent comments by my namesake . Once I specified the three arguments then I could run maintainDB with no problems.
  6. Re-start the TeamCity service and see it pick up the new settings.

I suspect that a few more times doing this and it won’t feel so daunting.


The ‘RadLangSvc.Package, RadLangSvc.VS, Version = 10.0.0.0, Culture = neutral, PublicKeyToken = 89845dcd8080cc91’ failed to load

For some while now I’ve been coming across this problem with Visual Studio 2010. It’s an odd one because to all intents and purposes the Schema Compare tool looks like it should work but when I come to open a SQL file I get this error.

I tried lots of things, most time-consuming of all a full install of Visual Studio. I did this six times and each time noticed an error with the SQL component but because of the way the installer worked I wasn’t able to get at it. If you’ve experienced this error you’ll know what I’m on about.

However, today I managed to get it working, and therefore I’m posting this info and this link. I found the fix here. I only needed to run the post installation MSI project.

Just for reference I’m pasting the content of Vikram’s post below but all credit goes to him.


The ‘RadLangSvc.Package, RadLangSvc.VS, Version = 10.0.0.0, Culture = neutral, PublicKeyToken = 89845dcd8080cc91’ failed to load

A couple of days ago, using the Schema Compare tool included in Visual Studio 2010 Ultimate, I ran into an error that reads:

“The ‘RadLangSvc.Package, RadLangSvc.VS, Version = 10.0.0.0, Culture = neutral, PublicKeyToken = 89845dcd8080cc91’ package did not load Correctly.”

The system continues to operate apparently, only after the settings when we kick off the comparison, the environment crashes fatal.
After a little ‘research I found this post which in turn refers to that.

The problem is essentially due to the installation of SQL Server 2008 R2, which affected various components associated with the SQL scripting. The same symptoms occur it is also using the SQL shell included in VS, even though I had installed the R2 for a while, ‘I have not noticed it before because I always use the environment to SQL Server Management Studio.
The proposed solution is to simply re-run the post installation

DACProjectSystemSetup_enu.msi

located on the installation disc in the folder of VS 2010

\ WCU \ DAC

but for more serious problems may need to rerun the other two in the same folder installer

TSqlLanguageService_enu.msi
DACFramework_enu.msi

take care of it in VS closed and once the installation is complete, there is no need to restart everything is already back in place.